EDIT!!! Today is February 23, 2016. I published this post in May of 2014, and a lot of people have written to tell me how useful and helpful it was to them. That is awesome! Even more awesome, though, is that WordPress.com now offers a widget to embed a Mailchimp Subscriber Popup. Here are some excellent instructions on how to use it. I would recommend trying that first, and then using the instructions I have here as a back-up plan. Good luck!
< START OF ORIGINAL POST >
The true gift of having a clearly defined definition of success is that you begin to find exactly what you need to achieve that success. I discovered YOUR FIRST 1000 Copies by Tim Grahl exactly when I needed a guide for book marketing. I want to get the word out about my books, and I want to do it without being subservient to a cumbersome system I neither understand nor enjoy. Grahl gives me a blueprint to achieve that, and having a newsletter is an integral element in his system. In this post, I share what I’ve learned about setting up a Mailchimp newsletter and integrating it into your (free) WordPress.com blog.
Here are the main points I will cover:
- Getting started with Mailchimp
- Customizing Your Mailchimp sign-up form to coordinate with your WordPress.com blog
- Use Google’s built-in developer tools to find the hexidecimal code for colors on your site
- Set the font or background in your Mailchimp sign-up form to match your blog
- Add the Mailchimp sign-up form to your WordPress.com blog
I chose Mailchimp because I get newsletters from other authors using it, and those newsletters look nice. Plus, Mailchimp has stellar set up guides and knowledge base articles. They also offer a basic free account that meets my needs, allowing up to 12,000 emails to 2000 subscribers.
There are a couple of things to know before you set up your newsletter:
- CAN SPAM law requires you link your mass email campaigns to a physical address – if you don’t have this and you are reported to Mailchimp, your account can/will be suspended!
- Mailchimp’s free account doesn’t provide auto-responders to send automatic emails triggered by specific subscriber actions. This means you will not be able to easily send every new subscriber a series of emails, unless you set it up for each user yourself. It is something to consider when selecting a plan, as auto-responder “drip campaigns” are an effective marketing tool mentioned in Grahl’s book .
Ready to get started?
STEP 1 Sign Up for Mailchimp
Sign up for a Mailchimp account
STEP 2 Define your First List
Follow the Mailchimp setup directions to Create and Import a List of Subscribers. This list is the “bucket” where all of your WordPress.com subscribers will go into once they sign up for the newsletter. The List Name you select is visible to subscribers, so take care to choose something descriptive and polite!
STEP 3 Build the Signup Form
Now the real fun begins! It’s time to build the signup form associated with your list! The signup form is your newsletter’s first contact with a potential lifetime supporter. As such, it should be clear on what is offered in return for signing up, and be respectful of the subscriber’s time. Remember that the more fields a person has to fill in, the more likely they are to decide not to subscribe. I started out with five fields, and have since altered my form to request only what I need (email and first name). I also left in the option to select Plain or HTML text, but if the subscriber is comfortable with the default (HTML), they need take no action.
The Signup form is located in the Navigation bar at the top of your List. Select the General Forms if you are going to link the subscription page to your WordPress.com blog. Here’s a picture of the Mailchimp Lists page, when Signup Forms is selected:
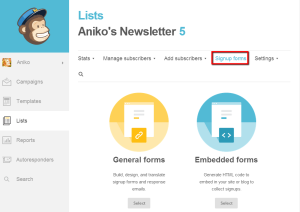
From the main Mailchimp page, select Lists in the left panel. Then select the list you created in Step One, and click Signup Forms (see image above). Click the General Forms button. Once you are on the Create Forms page, select the Build It tab.
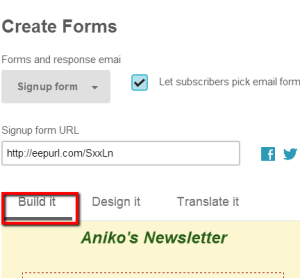
On the Build It tab, drag and drop items from the right onto the designer area on the left.
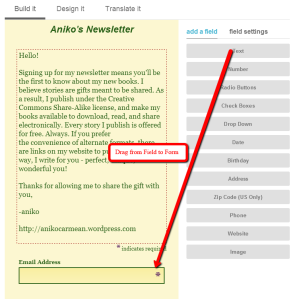
Don’t worry about the looks, we’ll take care of that in the next step. For now, just arrange the fields you want the user to enter the introductory text.
STEP 4 Customize the Signup Form to Match Your Blog
Now that you have the content and fields defined, it’s time to make the signup form look like it belongs on your WordPress.com blog. To do this, I am going to show you how to use the Google Chrome developer tools to locate the hexidecimal value for the colors on your blog. You can use another browser, as they all have Developer tools, but my video will show how to use Chrome. The first step is to open your blog in Chrome, then follow the video.
The video shows you these steps:
- From the Settings, select Tools -> Developer Tools
- The Developer Tools open by default at the bottom of the browser. The left pane shows the elements on the page (links, titles, images) and the right pane shows the attributes associated with each element.
- By default, the background color for the page is displayed at the top of the left pane; go ahead and copy that value (or memorize it, if such appeals to you!).
- You can discover the hexidecimal color value for any element on the page by clicking the magnifying glass on the Developer Toolbar (far left). Click the element you want to know about on the blog page, and scroll down in the right pane of the Developer Tool until you see the “Color” section. You will know it is correct because there is a tiny square of color in the Developer tool that tells you the color associated with the hex value.
Here’s the screencast video: Use Chrome Developer Tools to Get Hex Values
The screen cast may be slow to load! If you click PLAY and the screen goes blank, please wait. When the entire video buffers, you will be able to play it without experiencing lag. Thank you!
Now you can match the background color of the Mailchimp Newsletter to the background of your WordPress.com blog! This will give a seamless appearance to the experience of clicking from your blog to the newsletter signup. The background color for the Mailchimp signup form is located on the Design It tab of Create Forms:
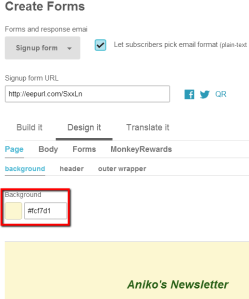
You can repeat the process to match the signup form font with the color of the font on your blog.
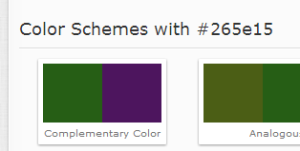
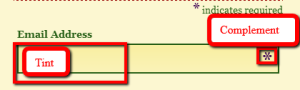
Finally, if you want to discover a complementary color to use in your signup form design, the Color Hexa site is amazing. I used the complementary purple color to my green font to color the asterisk that indicates required fields. It’s a small detail, but remember: newsletters are where you get and keep loyal supporters!
Not only does Color Hexa show you complementary colors (and their hex or RGB values!), but it will also show you the values to use to get a darker or lighter tinted version of the same color.
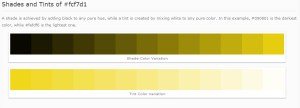
In my newsletter form, I used a darker tint of the background color to fill in the fields on the form to make them more visually pleasing.
STEP 5 Link the Mailchimp Signup Form to Your WordPress.com Blog
You are ready to go live with your newsletter sign up form! The final step is to add a widget to your WordPress.com blog and provide it with the URL for your newsletter. This will provide your potential subscribers an easy way to access the signup form, which is hosted by Mailchimp.
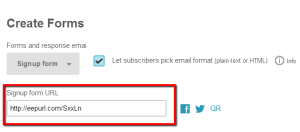
- First, copy the URL from the Lists -> Signup Forms page on Mailchimp.
- Open your WordPress.com blog dashboard.
- Go to the Appearance -> Widgets page.
- Drag a new TEXT widget into the Sidebar at the right.
- Enter a Title for the Widget (at the moment, mine is “Be a VIP!”)
- Enter the following HTML into the free-form text area:
<a href=”http://YOURMAILCHIMPURL“>The link text people will see!</a>
For example, mine would be:
<a href=”http://eepurl.com/SxxLn”>Subscribe to Aniko’s Newsletter!</a>
Remember, the text inside of the href will be displayed as the link users will click. Here’s what mine looks like:

The green font “Subscribe to Aniko’s Newsletter” is the portion that was in the HTML added to the text widget. Note that if you copy and paste my example, to replace the “smart” quotes around the URL – the way they are rendered in WordPress will break your link if you do not replace them!
Reload your blog, and verify that the link to the Mailchimp signup page works. Go through the sign up process, adjusting anything that feels strange or awkward about the setup. You are now the proud owner of your very own Mailchimp Newsletter, linked to your WordPress.com blog!
Congratulations!
xoxo,
-aniko
If you enjoyed this post, please subscribe to my newsletter.
I adore and reply to comments.

Click Me to Tweet about this post!
“I learned how to add a stylish Mailchimp newsletter to my WordPress.com blog!“